
Kατασκευάζοντας μία μποτίλια klein
A mathematician named Klein
Thought the Möbius band was divine.
Said he: “If you glue
The edges of two,
You’ll get a weird bottle like mine.”
This Instructable will teach you how to make a Klien bottle, which is a bottle with no distinct inside or outside; a non-orientable surface. You can read more about them here and on Wikipedia. A Klein bottle is very similar to a Möbius strip, the difference being, to quote Wikipedia, that “Whereas a Möbius strip is a surface with boundary, a Klein bottle has no boundary”.
A real Klein bottle could not exist in 3 dimensions though, as it passes through itself without leaving a hole. This is not a “real” Klein bottle, because it cannot exist in our world. This is merely the 3 dimensional expression of the impossible shape.
We have, however, figured out how to rotate a four dimensional object through its dimensions, and a good demonstration of that can be seen here, however I can’t seem to find a video of a Klein bottle being rotated through it’s four dimensions.
There are alternate versions of the Klein bottle like the “figure-8” shape, or the “Lawson-Klein” version, but in my mind they do not hold as much water as the classic Klein.
Step 1: Tools and Materials
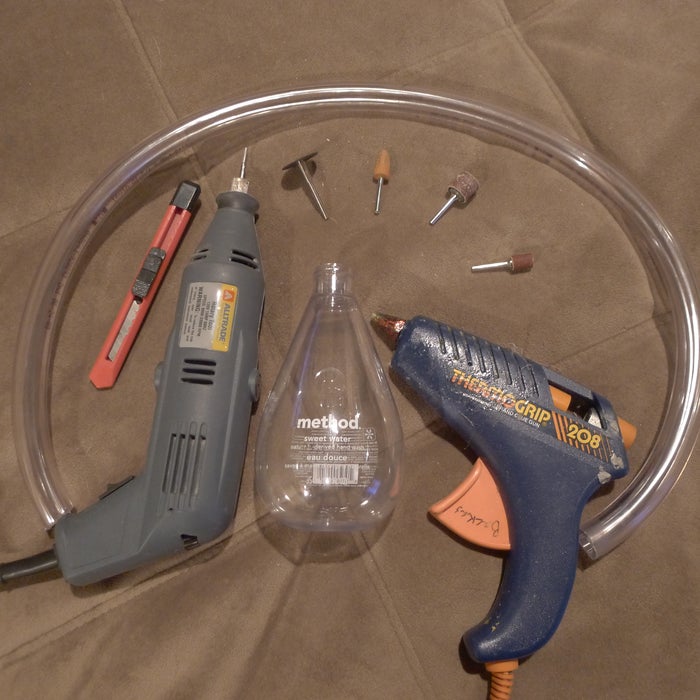
You could do this with any bottle and flexible or hard tubing, but to minimize headaches and joints in the tubing I decided to go with the following supplies:
Materials:
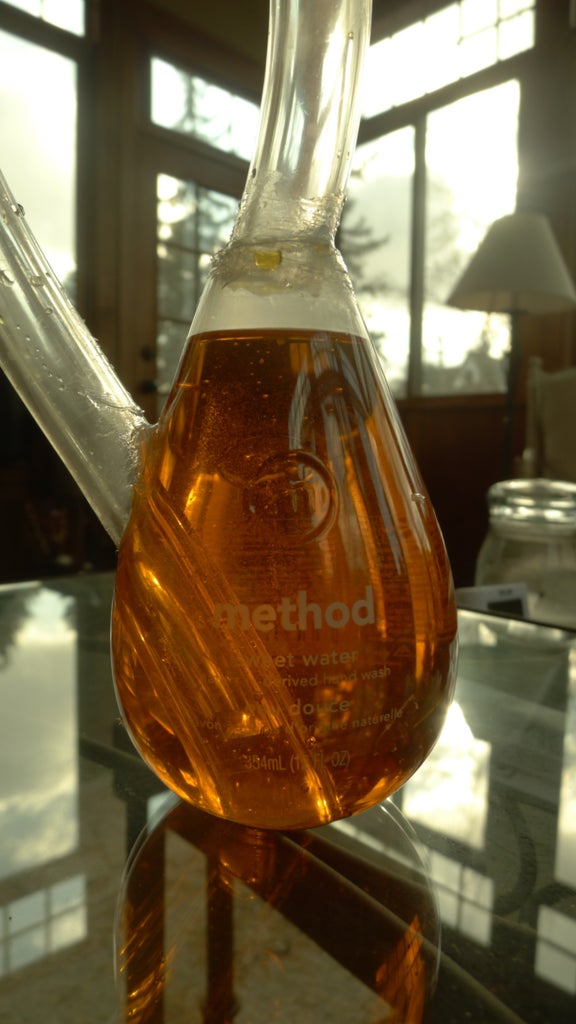
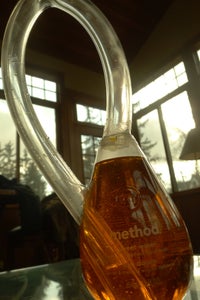
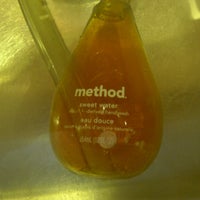
- Plastic soap bottle – I found that a Method soap bottle has the quintessential shape of a typical Klein bottle’s “body”
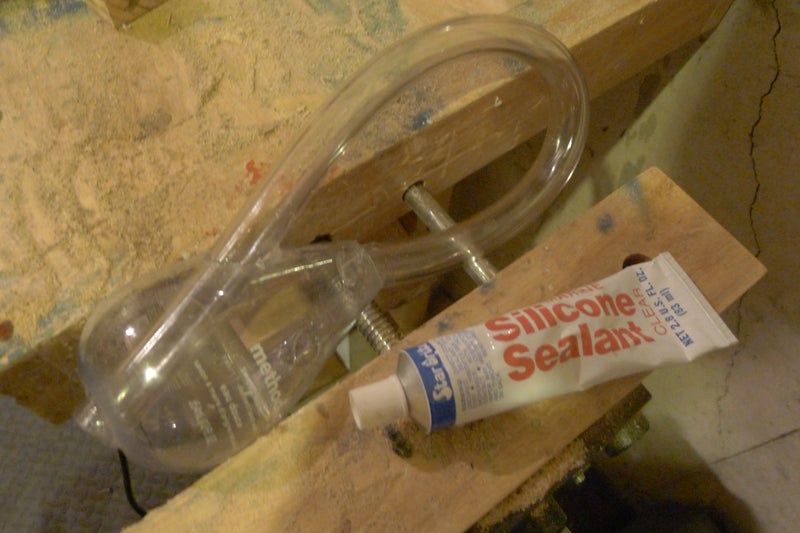
- Silicon sealant – to seal the joints of the tubing and bottle in order to get it water-tight
- Clear Vinyl Tubing – 5/8″ ID x 3/4″ OD, purchased at Ace, similar to this
- Hot glue sticks – for use with the hot glue gun (optional)
Tools:
- Sharp utility knife – for cutting the tubing and removing burs from your bottle
- Dremel or other rotary tool – for use with attachments
- Dremel cutoff disk – for modifying the bottle
- Dremel grinding and sanding attachments – For shaping the holes of the bottle in order to accommodate the tubing
- Hot glue gun – If the silicon sealant isn’t enough to hold everything together, hot glue is your next best bet (optional
- Marker – for marking out holes and cuts
- Heat gun – For help bending the tube *optional*
If I had one available, I probably would have used this larger Method soap refill bottle, with the same shape.
Later on I think I might try the two-layered Klein bottle with the large and small Method bottles, should I get my hands on one of the big ones.
Step 2: Planning Your Design

One tricky part about using the clear vinyl tubing was that it got kinks in it if it was bent too far. You need to find a sweet spot between having the tube too long and having it too short in order for it to not get a kink in it.
First, cut a small 1 inch section off the end of your vinyl tube. You’ll make this into a template for the hole on the side of the bottle. Put your bottle on a table and bend the tube into its final position above the bottle. It’s possible to use a shadow to help you with alignment. (You’re probably using two hands to bend the tubing into shape, so either memorize the location of the intersection of the clear vinyl tube and the wall of the bottle, or get a friend to help you with lining the 1″ slice of tubing up above the intersection, and using the marker to draw a line that follows the edge of the bottle.) mark the height on the bottle where the tubing crosses it. look at the first picture for an example of this piece.
If you’re short-handed and have to memorize the position of the intersection, drop the tube and then place the 1″ section where you remember the intersection to be, and mark a rough line on the slice of tubing where the edge of the bottle The pictures might be the best representation of this. It isn’t critical that this is perfect, but you should get a good general idea of the placing and angle.
This is necessary so that you have an accurate template for the positioning and size of the hole on the side of the bottle. If it is too high or too low, the tube could easily get kinked or the finished product might be really hard to fill. It’s important to get the angle correct so that the hole you cut will fit the tubing and accommodate its angle. If you have a heat gun or way of directing heat at the tube in order to help it bend and stay in place without kinking, just make a curve that looks good! Ideally the tube on mine would’ve been shorter, but I was limited by the integrity of the tube as a circle.
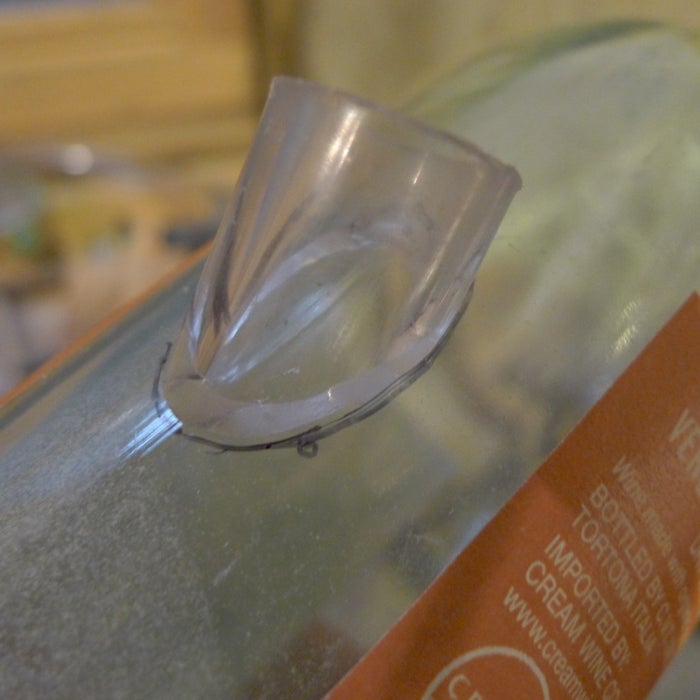
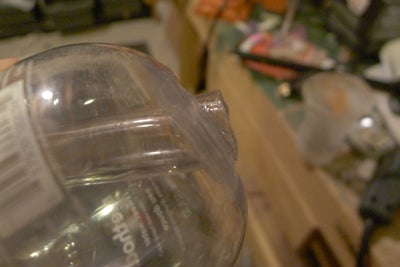
Mark the tube on the top and bottom where it should connect to the bottle during this step, because you’ll already have the tube in the position you like. Note that if your tube is going to go over or under the threads on the bottle, the mark should not go at the point of contact, but at the end of the threaded portion.
for the top connector, If the tube does not fit on the inside or outside of the top of the bottles threads, you need to either sand the threads off or cut the entire threaded portion off. If you’re using a very cylindrical bottle where the threaded portion is much smaller than the of the bottle itself, you need to keep the threaded section on and work around it, possibly by whittling your tubing down.
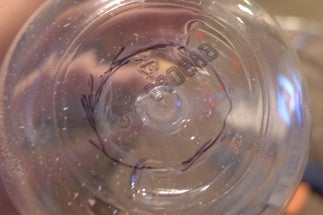
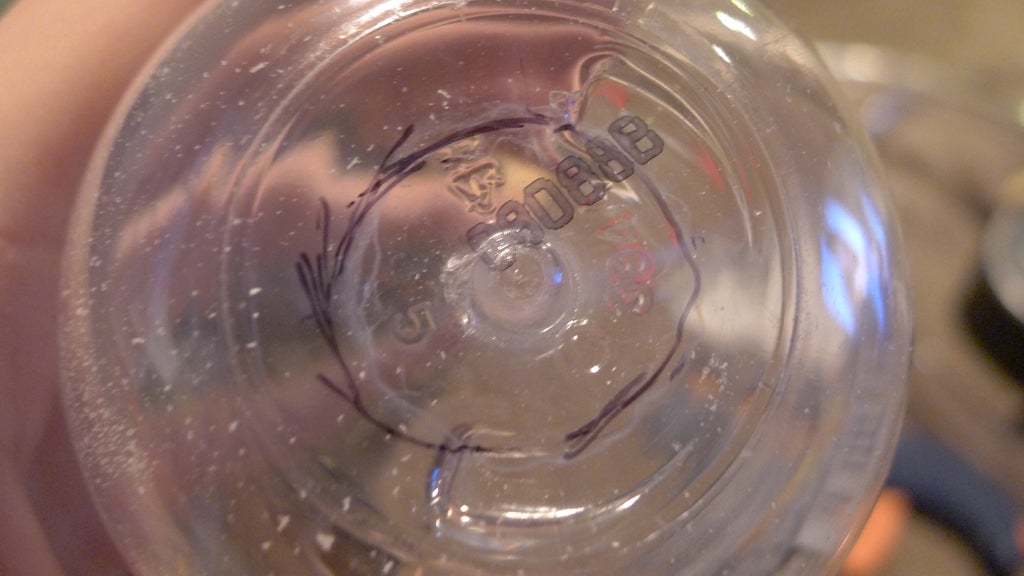
On the bottom of your bottle, trace a circle with the slightly smaller outside diameter as your tubing.
Step 3: Making the Cuts
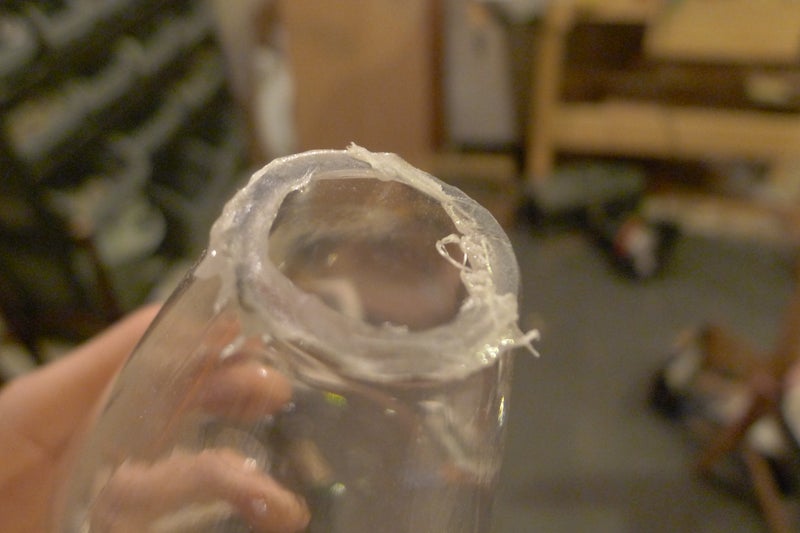
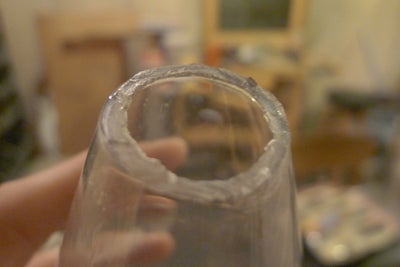
Start your hole on the side with a drill bit in your Dremel. I cheated a bit and when straight to the sanding attachment by angling the barrel and slowly pushing and tilting it until it could fit inside the bottle. Once you can get the sanding barrel into the hole you’ve made, sand in a slow and consistent circular motion around the hole, avoiding stops so that you don’t sand away too much in one area and get a bump.If you traced properly around the angled sample you made, you should cut the hole slightly shorter than your markings; the width of the tube stays the same but the height of your hole changes with the angle that it intersects the bottle.
In a real four-dimensional Klein bottle, this hole would not be necessary. Curse you fourth dimension!
For the top connection of the tube to the bottle, you really lucked out if your tube fits snugly on the inside or outside of the threaded portion. Go ahead and pat yourself on the back for your bottle choosing skills if this is you.
For the less fortunate, those of you who decide that only your threads need to be sanded off and it’ll fit snugly, go ahead and bust out the ol’ Dremel and attach its sanding barrel snugly. Go ahead and sand the threads off, but do it a little at a time and try the fit. If you’re so close and don’t want to put yourself through the ordeal described below, you can take your Dremel’s sanding attachment to the inside of the vinyl tubing and thin the walls out a bit. For some reason, I thought of this as cheating, but you can make your own choices.
For the poor DIYers out there with a completely incompatible length of tubing and bottle threads, you’ve gotta cut the threaded portion off entirely. Go ahead and cut the threaded portion off with your Dremel equipped with its cutoff disk, remove the burs with a utility knife, and test the fit. If you have a bottle that slowly tapers to the threaded area, like my bottle, and your tubing is still too wide, you can sand down the hole and make it larger and larger to fit the tube in.
For the bottom connection, simply cut a hole on the inside of your traced circle on the bottom, slightly smaller than the tubing. Sand it slowly with your Dremel to give it a tight fit, as this hole is the most important in its accuracy if you plan filling your Klein bottle with water.
Cut the tube at your marking, straight across, with a sharp utility knife. It doesn’t have to be perfect, and you’ll trim it up later, but you want to have the basic length of it down.
When you’re finished making the holes, you should make sure everything fits where it’s supposed to go, and that the tube is kink-free. Make adjustments with the sanding barrel, but keep in mind that it should be a very tight fit, especially at the top and bottom where there’s not much contact area between the tubing and the bottle.
Step 4: Sealing
Sealing the bottle is essential if you want to put liquid into it. For me, the sealant I used also helped to hold everything together.
I probably should have used a dedicated glue to affix everything together, but in the end this sealed it completely and was almost unnoticeable.
Get your tubing and bottle together in their final position. The top connection should have little overlap, but do what you need to in order to make it secure. At the bottom connection, the tube should go through the hole and have excess coming out; you can cut off the leftover afterward. If there’s a kink in the tube now, there will be when you’re finished, so get just the way you want it.
To seal, I ran a bead of sealant around the perimeter of one hole at a time, followed by running my finger smoothly across it to close all of the gaps and cracks. It might help to gently push the tubing in and out of the bottle, in order to get some of the sealant in the joint itself.
To clean it up and give it a smoother look, I pulled a shop towel over my finger (think fancy person with a napkin) and dragged it across the seal lightly.
If you need more structural support for the positioning of your tube, you should use a glue. A hot glue gun might work well to affix everything together quickly if your positioning requires you to hold it in place, but an epoxy would be bullet-proof. Your design should try to avoid too much stress on the top and bottom joints though, anyways.
Wait the recommended time for all of your glue and/or sealant to dry. I had to wait a day, so I left it in a safe and clean environment in a position that did not stress any of the joints for 24 hours.
When it’s dry, make sure all of the connections are strong and gap-less. Then, cut the bottom section that protrudes off using the utility knife. I found it best to angle the knife tip into the center of the tube, so that it profiled the joint more. Be careful not to cut the silicon off or nick it in a way that would compromise it’s water-tightness.
Step 5: Filling It!


The trick is to pour water to the top of the tube that comes out of the bottom, place a finger over the hole, invert the bottle until the bubbling has stopped, turn the bottle upright again, and repeat from the start until you have a water level you’re comfortable with.
Alternatively, you could submerge the entire bottle and forgo the filling part, but you still would need to invert the bottle. I didn’t have a tall enough sink to do this.
Another way to fill a Klein bottle would be to get a tube that has a smaller diameter than the tube of the bottle, thread it through and into the main body, and then attach a funnel or syringe to the tube to put water in it without needing to have separate air and water exchanges.
In order to add colored water to your Klein bottle, complete the steps listed above, and then place a few drops of food coloring inside the tube at the bottom. Plug this hole with a finger or cork, and then repeatedly turn the bottle end over end until it has all mixed together.
https://www.instructables.com/How-to-make-a-Klein-Bottle/